I've been receiving positive feedback on my quilled candle holders, even
a request to make a tutorial! I can't tell you how honored I am that
someone wants to learn something from me. So I'll share my way of making
these candle holders. They can be of many shapes and colours, but since
I prefer round and red, and taking into account the upcoming
Valentine's day, it's going to be something like this... I dedicate this
tutorial to Karen Davis and everyone who takes time to peek into my
work , thank you for being interested!
*******************************************************************************************************************
Pozitív visszajelzéseket kaptam a quilling gyertyatartóimmal
kapcsolatban, ezért gondoltam megosztom veletek én hogyan készítem őket.
Sokféle színű és formájú lehet egy ilyen gyertyatartó, s mivel jobban
szeretem a kör alakút és a piros színűt, tekintettel a közeledő
szerelmesek napjára, most ilyen lesz :)
I started with a clean, flat, plain piece of carton (the remains of a pizza box) but any type of cardstock which is hard enough would do.
Draw a circle on it (or any shape that you'd prefer)...
...then cut it out. Making the base hard enough, or having a base at all, will assure more stability to the candle holder
Cut out two circles of coloured copy paper, one of the size of the cardboard, the other slightly bigger (at least 2-3 cm bigger)
Glue the bigger circle to the cardboard.
Cut in the margin.
Glue the margin to the cardstock.
When completed, it'll look something like this:
Glue the smaller circle to the cardboard, so it will cover it completely.
It will look something like this, but don't worry, this will be the bottom, it won't be visible, and we'll decorate the other side...
...this one. It's flat and clean.
Put the candle in the middle and draw a circle around it.
You're ready with the base, now prepare the strips for the decoration. I work with A4 size coloured paper, and manually cut it into 1 cm strips. It is easier to work with some thinner cardboard (120-130 mg) than with simple copy paper, because it holds the modeling, and the coils won't open so fast.
Make some tight coils. The number of the coils depends on the thickness of the paper.
Glue them to the carton, around the drawn circle.
Then make some marquises (I'm not sure what's the plural for that word...) and fill in the empty space.
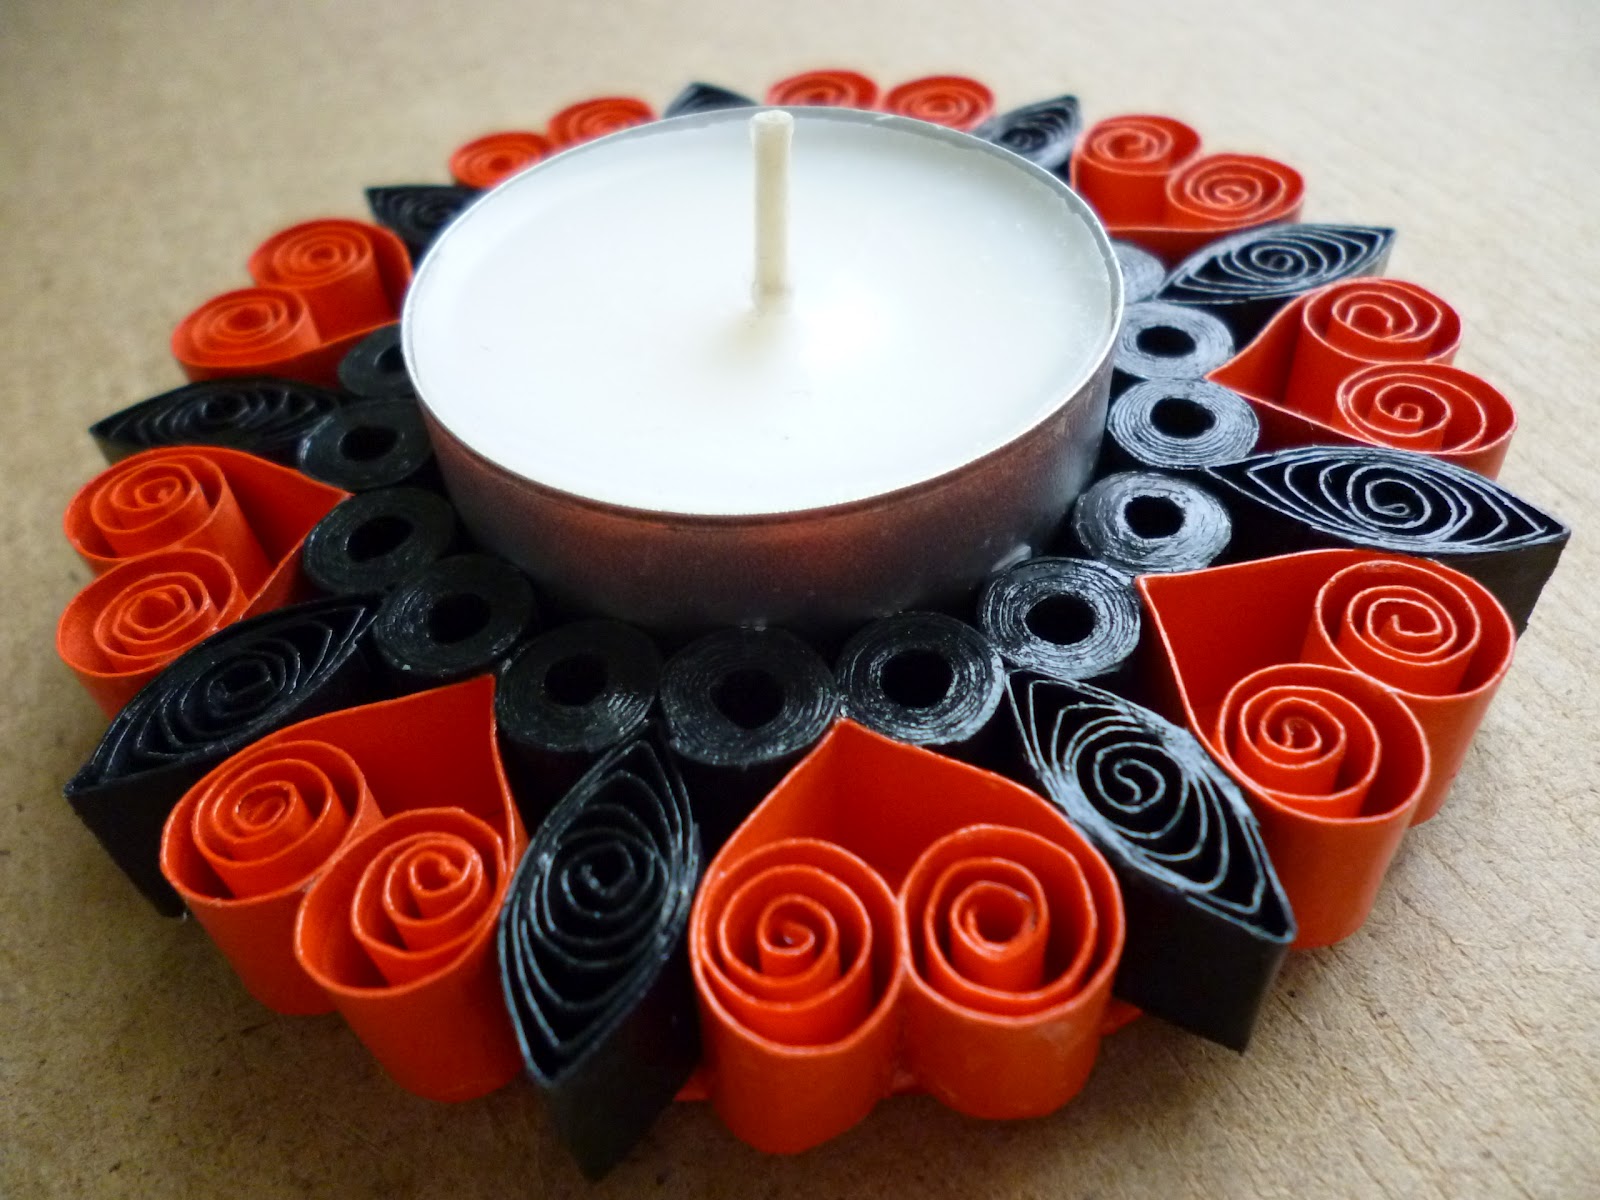
Put a candle in the hole and there you are... :)
It looks better with a little shine on it :) I use waterbased glossy enamel.
I hope you enjoyed it!